EAV V.2.1 USER’S MANUAL
DISCLAIMER AND LIABILITY
The unit is used under the sole responsibility of the user without liability to the manufacturer.
We assume no liability for damage or loss resulting from misuse,
mishandling of any EAV v.2.1 Software component. We make no guarantees or warranties with
respect to the contents or the use of this manual and/or EAV v.2.1
Software.
The information provided in this manual is for informational purposes only and is not intended as a substitute for advice from your physician or other health care professional. You should not use the information in this manual for diagnosis or treatment of any health problem or for prescription of any medication or other treatment. You should consult with a health care professional before starting any diet, exercise or supplementation program, before taking any medication, or if you have or suspect you might have a health problem. You should not stop taking any medication without first consulting your physician
EAV v.2.1 Software license agreement
The Association of Alternative Medicine grants Buyer non-exclusive right to install
and use Meridian Testing Program v.2.0 on a single computer and a single terminal for the purpose of operating
products purchased by Buyer from the Association of Alternative Medicine.
You may install one additional copy on a laptop or a home computer provided that it is
owned by you, for your use for archival purposes.
The Software’s content is protected by copyright laws. Buyer may not rent, lease,
loan the Software without the prior written notice of the Association of
Alternative Medicine. Buyer may not
disassemble, copy, reverse engineer, decompile, modify, sublicense, assign,
create a derivative work from, or use the Software in any manner except as
stated in this Agreement.
Except as set forth in this paragraph, the Software is licensed “As Is” without
warranty of any kind, expressed or implied, by statute or otherwise, including
but not limited to the implied warranties of merchantability, non-infringement
and fitness for any particular purpose. We do not guarantee or warrant the
suitability of the Software or that it will meet your requirements.
The liability of the Association of Alternative Medicine under the warranty set
forth above shall be limited to the amount paid by Buyer for the product.
The Association of Alternative Medicine and its suppliers will not be responsible
for any indirect, incidental, special, or consequential damages (including
damages for loss of business, loss of profits, etc.) whether based on breach of
contract, tort and negligence, product liability and the like the Association
of Alternative Medicine’s liability to Buyer will be limited to the amount paid
for the product
All technical related issues should be contacted: www.biopulse.org, email: ryodoraku@gmail.com Skype: thinkhowme
GENERAL INSTRUCTIONS
The
place of examination should be protected against the high-power sources of
electromagnetic fields to avoid the interference in the measurement process. If
there are other electrical devices which are the sources of electromagnetic
fields, it is necessary to switch them off before person’s examination.
The device connection/disconnection is realized only when the unit is switched off.
The connection of the USB- port cable, electrodes for frequency correction,
measuring active/passive probes and passive probe is realized only in dedicated
for them jacks (sockets).
The computer should be reliably grounded.
GENERAL REQUIREMENTS TO EXAMINATION PROCEDURE:
An examinee should take off watches, rings, glasses with metallic items, jewelry which may interfere with the readings should be removed before examination. Hands and feet should not be moistened with oils, lotions or excessive perspiration. It is undesirable to take pills, alcohol, coffee affecting nervous system prior to the examination. Before taking a measurement wait for some time after drill, meal, etc. A person should be calm and relaxed. Don’t hold the passive electrode too firm or too loose as it can create altered measurements (too firm contact creates higher readings, too soft contact creates lower readings).
To create
an accurate reading an examiner should not touch the examinee during
measurement (only touching the measurement point by the active/passive probe,
no physical contact).
Make sure that the moistened cotton on the active/passive probe is in contact with metal
of the probe. The moist cotton should not be too wet or too dry. It is
appropriate to douse in water the active/passive probe to maintain cotton
moistened during the test.
If the skin of the examinee is too moistened with oils, lotions or perspiration dab gently
excess moisture avoiding friction over the hands and feet During measurement
don’t press too hard or too gentle on the examined points. The same requirements are applicable to Vega
test.
REQUIREMENTS TO PROCEDURE
It is necessary to remove ornaments, watches, glasses. The clothes should be from natural fabric. Remove all devices radiating electromagnetic waves such as beeper, cell-phone etc. minimum on a meter.
INTRODUCTION
The present
Maintenance Guide is intended for acquaintance with the rules and order of EAV v.2.1 software operation.
EAV v .2.1software has been designed to be easy and simple to use and comes with a comprehensive guidance to maximize ease of use. The
Maintenance Guide contains information necessary for correct device operation
and maintenance. You should read the manual carefully before using the
software.
EAV v.2.1 Software contains a technique that can be used to
precisely assess a whole body health via meridian measurements and obtain
information about the state of a person’s health
The software is intended for getting system evaluation, for defining functional activity of
organs and systems based on the EAV and Vega test methods;
The main
objective of the software is to become integrated with a computer thereby
becoming more user-friendly for the practitioner. It preserves all of the
functionality of the original method but
allows the practitioner to send results of meridian measurements directly to
their PC and create automated and accurate information at each visit.
The direct reading from probe to computer saves the practitioner's time and allows him to
obtain analysis information of the entire body within a shorter time.
The device and software are easy to learn, install, fast and simple to use.
SOFTWARE INSTALLATION
Before installing the software make sure that the computer satisfies with the technical requirements.
Put CD with “EAV v.2.1” software
into CD-ROM drive.
You need to copy the
software from CD on the hard disk of the computer. Open the folder and you will
see there 1 file![]() . Click the
. Click the ![]() file.
file.
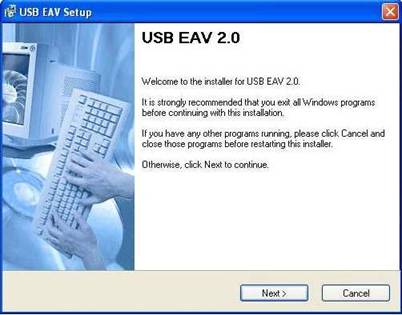
The installation process begins.
You need to press ![]() to choose a directory where you want to
install the software
to choose a directory where you want to
install the software

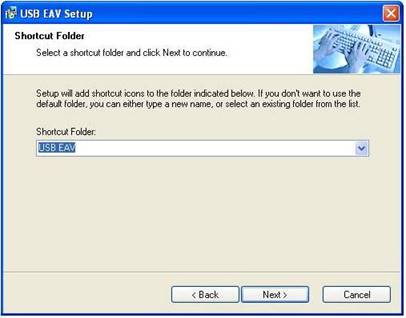
After you have chosen the directory press the button ![]() to continue with installing the software. The next window creates a shortcut icon of the software in the directory. You can also rename the folder.
to continue with installing the software. The next window creates a shortcut icon of the software in the directory. You can also rename the folder.
Then press the button ![]() again
again
The software is ready to be installed on your computer and setup program informs you about it.
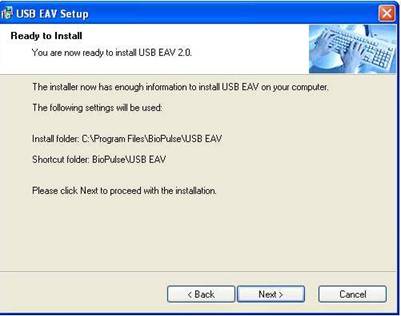
If you agree with the
setting you chose, press the button ![]() to proceed with the installation.
to proceed with the installation.
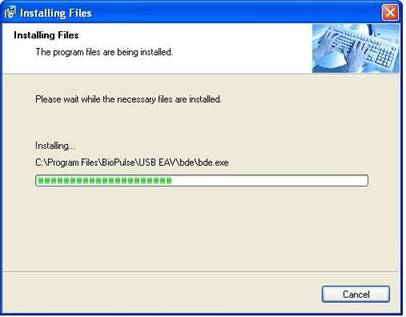
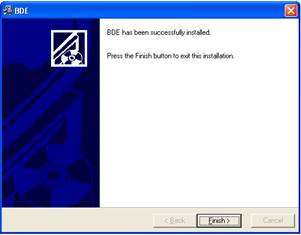
When the software is successfully installed on your computer you will see the following window:
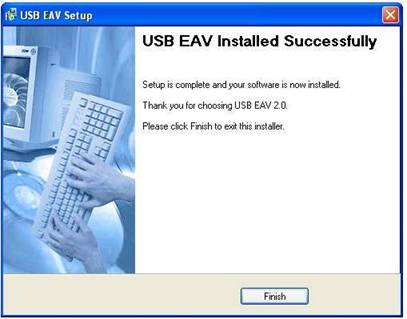
You need to press the button ![]()
The software EAV v.2.1 is installed
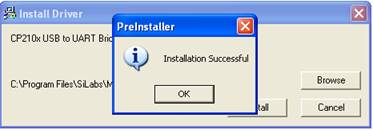
together with the drivers to it. The icon ![]() in the main folder installs the drivers of the
software on your computer. This window appears together with the previous
window
in the main folder installs the drivers of the
software on your computer. This window appears together with the previous
window ![]()
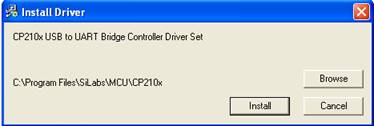
You need to click the button ![]() if pointed directory suits you or choose a new
directory where you would prefer the drivers to be installed.
if pointed directory suits you or choose a new
directory where you would prefer the drivers to be installed.
Together with the drivers you need to install the software database on you computer.
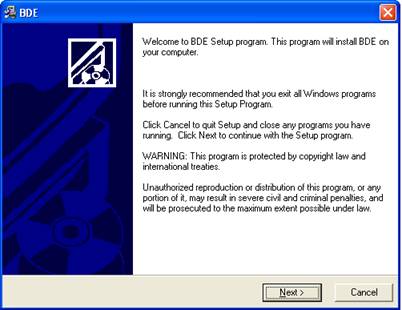
You need to click the button ![]() to install it.
to install it.
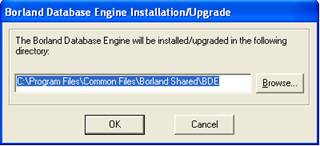
Press ![]() or
or ![]() to choose another directory.
to choose another directory.
THE EQUIPMENT OF THE EAV v.2.1
Your EAV v.2.1 Software comes with the following supplies:
1)active/passive detecting tester (probe) for EAV diagnostics.
2)passive electrode for a testee
Additional supplies for EAV and Vega:
3)an inbuilt metal honey comb (plate) for testing of food intolerance,
allergens, drugs, vitamins and so on.
SYSTEM REQUIREMENTS:
Make sure that your computer meets the following requirements to avoid inconvenience and problems that will result not having a computer with the following specifications:
Pentium III or above;
The operating system Windows 2000, XP or later
RAM 64 Mb or above;
10 Mb of free space on the hard disk;
Color monitor;
Keyboard;
CD-ROM drive;
The mouse or compatible indicating device;
One free input / output USB-port;
Any printer supporting Windows operation system.
DEVICE INSTALLATION
Place and mount the device according to safety measures and general instructions of the present manual in a following order:
- place the device elements and PC on the workplace;
- check up computer disconnection from the power supply;
- check up the device disconnection;
- connect the cable of the active-passive probe or the cable of the passive electrode to dedicated for them jacks, connect USB- port cable to the free input/output USB-port of the computer.
STARTING AND EXITING EAV v.2.1 software
Before starting the device software
make sure that the unit is connected to the computer.
A short sound signal is generated if the device is on
Check the connection of the device, active/passive
detecting probe and passive electrode, USB-port cable to the device and
computer visually.
To start the program, click the program EAV v.2.1 
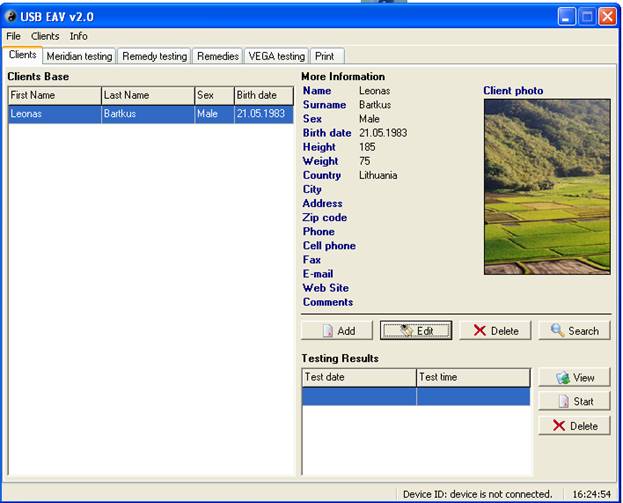
(Fig.1)
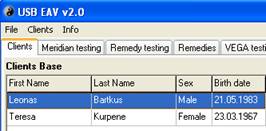
The Introductory window of the program will appear on the screen, if there is no information about patients in the database the fields with name, surname and contact details will be empty, or if the information has been in database appears the Introductory window (Fig.1) with clients list where the fields Surname, Name, Born, Date test are completed.
To exit from the program click the
mouse on the button ![]() , which is in the program Title Bar
, which is in the program Title Bar
ELEMENTS OF THE SOFTWARE’S MAIN WINDOW
After the start of the program the Introductory window (Fig. 1) appears on the screen. Some elements are typical for all windows in Windows, some are specific only for the device’s software.
TITLE BAR
Title bar is on the top of the program window, the name of the
program (USB EAV v.2.1) is indicated in Title
bar. The title bar is always highlighted by the blue color that testifies
the activity of the given window and possibility of work with the given window
at the moment.
>With the window control
buttons which are on the right in the title bar you can: minimize the window
into a button on a taskbar ![]() , to maximize the window on full desktop
, to maximize the window on full desktop
![]() ,
to restore the window to its previous size
,
to restore the window to its previous size ![]() ,
to close the window
,
to close the window ![]()
TOOLBOX PANEL
File
Click File -> Exit - use File and Exit tabs to exit the program.
Clients
Click Clients -> Add client - use Add button the introduce a new client in the software’s database.
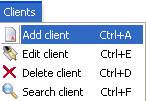
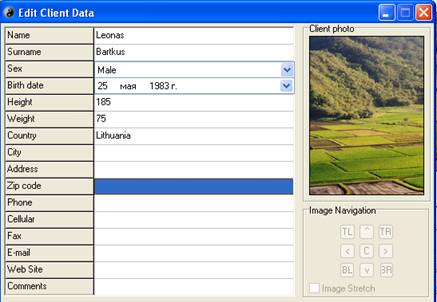
A new client card window will be displayed.
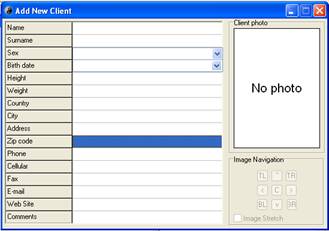
Type in the Name, Surname, choose Date of birth, set client’s Sex, Height and Weight, enter client’s Address, contact details such as Site, E-mail, Phone numbers and enter Comments about the client or fill in other fields you think important for you.
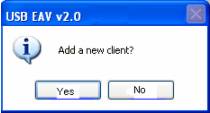
When you finished typing all the information, press ![]() button and the program will ask you:
button and the program will ask you:
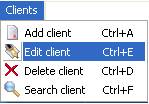
Click Clients -> Edit client - use this button directly from toolbox panel to edit the information about your patient.
Choose the necessary client from the list of Clients Base click on the client’s Name.
The line with this testee will be highlighted by blue color.
Then press Clients->Edit client
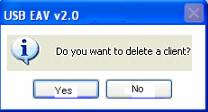
Click Clients -> Delete client – choose necessary client from the list and delete him from your database.
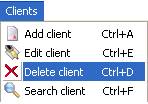
The program will ask you to confirm deletion.
Click Clients -> Search client – find a client using different search parameters, such as name, surname, date of test, weight, height, address and so on.

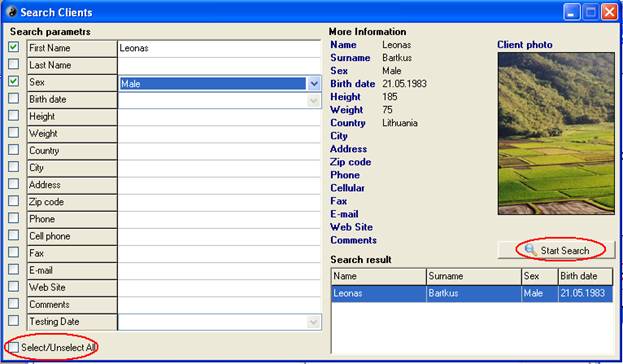
You may check the box ![]() and perform searching using all these options,
or you may remove the check to perform searching using definite parameters.
and perform searching using all these options,
or you may remove the check to perform searching using definite parameters.
and then press the button. ![]()
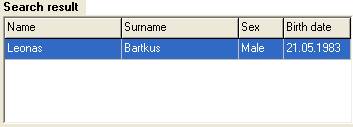
Search results will be displayed at the right bottom of the window.
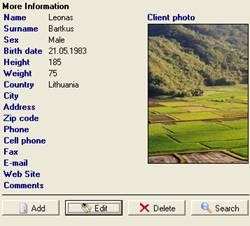
Alternatively you can use the buttons
which are located under the filed with patient’s information.
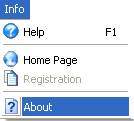
Info
Click Info -> Help information about software and device operation and get you connected with our Support Team through Internet
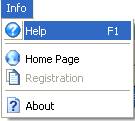
Click Info -> Home Page - to get directed to our website.
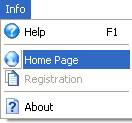
Click Info -> Registration – to make a registration of the software.
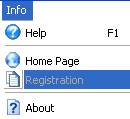
Click Info -> About - short reference information about EAV method.
MENU BAR
The Menu Bar is under the Toolbox Panel. Click on the necessary command to execute it.

Clients
The Clients tab ![]() is always present in the Introductory window of the program.
is always present in the Introductory window of the program.
It is a management database, which records clients' information (such as name, last name, phone, etc.) and tests' history.
To choose the necessary client from the list click on
the client’s Name.
The line with this testee will be highlighted by blue
color.
You can perform the same operations as in the tab ‘Clients’ of the toolbox panel. These operations are:
Or you can choose the patient which is already introduced
in your clients base and conduct diagnostics pressing the button
![]() This button automatically opens the tab
‘Meridian Testing’.
This button automatically opens the tab
‘Meridian Testing’.
If you want to view some previous tests of the client, choose a necessary one from the Clients Base and click View button which will show you all the tests you have done before on a specific client.
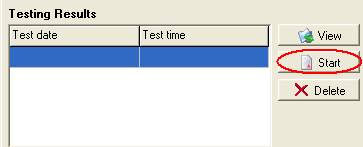
The button ![]() enables you to view the old records of the
patient.
enables you to view the old records of the
patient.
The button ![]() erases the measurement results from the
history.
erases the measurement results from the
history.
Choose the client and select necessary testing date for
deletion.
Meridian Testing
To start a measurement you need to choose a necessary client from your Clients Base or introduce a new one, click Start button opening the tab ‘Meridian Testing’ and start meridian examination.

The software directs you in performing all meridian measurements. Every point is graphically illustrated where the measurement point located which a patient and practitioner may view and follow the screen. The pictures clearly show the precise location of the acupuncture point to examine, and it is simple even for new users.
The measurement point which is showing green color and blinking is the one you are measuring at the current moment.
You can choose a meridian for examination, measuring a definite one or examining all 20 meridians.

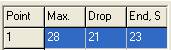
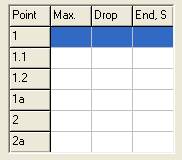 - the measurement results field where:
![]() - indicates the name of the point on the given
meridian which is tested at the current moment and where the measurement is
carried out.
- indicates the name of the point on the given
meridian which is tested at the current moment and where the measurement is
carried out.
![]() - indicates the maximum
value of the point
- indicates the maximum
value of the point
![]() -
the drop of the point value
-
the drop of the point value
![]() - shows the measurement
value when you put the detecting probe away from the point and its second.
- shows the measurement
value when you put the detecting probe away from the point and its second.
If you check the box with![]() ,
choose the meridian where you want to examine the control point and see its
values: maximum value, drop value and value when the measurement was stopped.
,
choose the meridian where you want to examine the control point and see its
values: maximum value, drop value and value when the measurement was stopped.
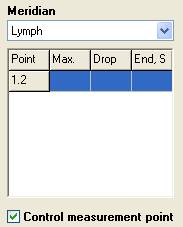
this option visually shows you the measurement results you get during meridian
examination (the same like the graph with skin conductance measurement).
Like in this example a figure 70 shows maximum of the point’s value. ![]()
![]()
![]() - shows the drop of the point’s value.
- shows the drop of the point’s value.
On the right side of the ‘Meridian Testing’ window the display scale of the skin conductance measurement is located.
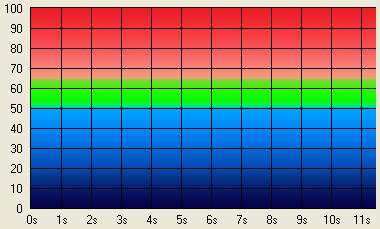
It consists of the numerical values of the skin
conductance level and dynamic display white line. The white line is a real time
graphing of your skin conductance received from organs’ representative
points.
The vertical line on the left side of the graph displays numerical values of skin conductance level.
The horizontal line of the graph shows the seconds of measurement process. You can test the point within 30 seconds.
White line– displays a real time graphing of a point measurement at the moment of testing.

The program automatically calculates and enters the skin conductance level for the particular point measurement. All readings are displayed in the evaluation form under the display scale.
![]() - if you check the box with Auto Next, then
the measured value will be automatically entered in the software without
pressing the button on the probe. You can select the time in which the software
automatically enters the measured value and shifts to another point.
- if you check the box with Auto Next, then
the measured value will be automatically entered in the software without
pressing the button on the probe. You can select the time in which the software
automatically enters the measured value and shifts to another point.
The description and rules of the TESTING process.
Step one:
The device is connected to the computer, USB-port
cable is connected to the computer and device, active/passive probe, electrode
are connected to the device. Start “EAV v. 2.1” software.
Make all necessary general requirements to examination
procedure.
Note: the device does not need calibration as similar
devices require and works always correct.
Step two:
Douse the tip of the detecting probe in water or salt
solution and start measuring the point.
It is appropriate to douse the detecting probe’s tip in water to
maintain proper contact with skin during the test.
Step three:
Have the client hold the probe not too loose or not
too tight.
Step four:
With the feet resting on nonconductive ground the
client seats comfortably on a chair or lying on a bed. The examinee should not
contact metal, wall furnishings.
Step five:
Choose a necessary client or introduce a new one in
software’s Clients Base and click Start button.
Without touching, probing or palpating, place the
active/passive measuring probe over the examinee’s test point a с cording to the point’s illustration, since that moment
the reading begins. The white line steadily rises to a certain value where it gradually stabilizes.
The measurement of each point is performed within some seconds and the program automatically gets measurement readings of the meridian conductance value on each second, then the software calculates the average value of the point.
After some seconds when the running white line stabilized and reaches the second you want to stop the measurement, you need to press a small black push-button on the active/passive probe.
Every measurement value is
accompanied by a beep when you place the probe on the skin and when you press
the small black push button on the probe. The value is recorded in the evaluation form (under the
display scale) or alternatively you can
press ![]() or press manually keyboard entry on your
PC to enter the examined value in the Measurements’
results field.
or press manually keyboard entry on your
PC to enter the examined value in the Measurements’
results field.
There is also another function providing you with the possibility to shift to another point without pressing the push-button on the detecting probe.
You can check the box
with ![]() to choose a second in which the software will enter the measurement value and shift to
another point automatically.
to choose a second in which the software will enter the measurement value and shift to
another point automatically.
For example, if you select 0 seconds, it shifts you to measurement of another point at once; if you select from 1 till 60 seconds, the program has to shift to another point within 1, 2, …..60 seconds depending on time chosen.
To go to the next measurement you need to place the measuring electrode on the examinee’s skin in accordance with the next point’s illustration.
Special Note:
If the active/passive probe does not start
reading right away make sure that the cotton swab is moistened enough and the
probe is connected to the device.
A stable running red line shows that the measurement is accurate but there can be a break in the graphic line, continue to measure a point and wait for a while, it is probably passing. A break indicates that the signal has broken. It often happens if the skin conductance is not sufficient and your energy level is low, then the measurement won’t be accurate as it won’t show the information about your health.
Remedy testing
To start a measurement you need to choose a necessary client from your Clients Base or introduce a new one, open the tab ‘Remedy testing’, connect metal honey comb, detecting probe, have the patient hold the passive electrode.
Choose the meridian on the body side you want to test and the name of homeopathy remedy in the software, put the corresponding vial or liquid on the metal hobey-comb and start meridian and medication examination.
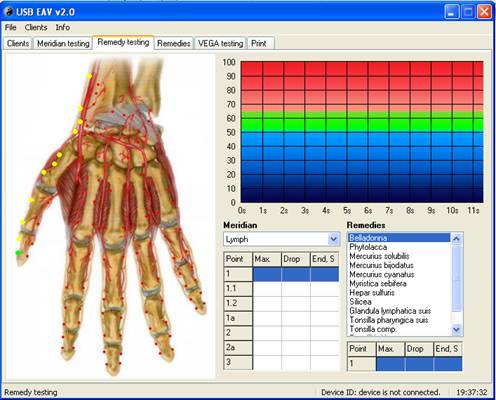
The fields 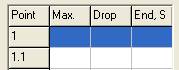 shows
you the point’s name, maximum value of the point, value drop and the second
when the point’s test was completed (when the detecting probe was put away from
the point).
shows
you the point’s name, maximum value of the point, value drop and the second
when the point’s test was completed (when the detecting probe was put away from
the point).
It should be emphasized that the various extracts are in homoeopathic doses. Dilutions of 10^-4 or greater are usual. In addition, these extracts are in sealed ampoules which are inserted into the metal honeycomb. The ampoules should be not opened. The current flows around these ampoules and it is possible to test a point.
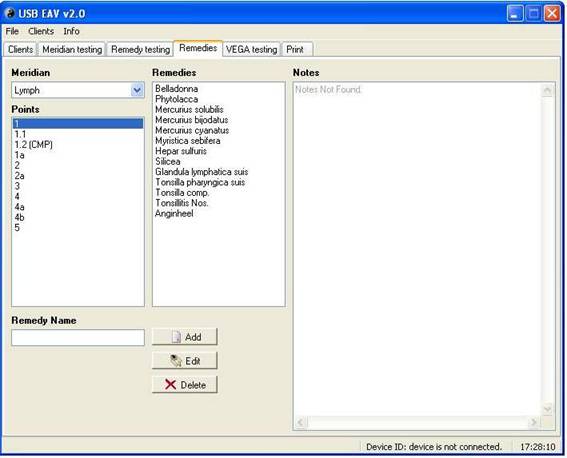
Remedies
This window of the software is supposed for your notes about meridians, points,
remedies.
We have put in the software some names of homeopathy remedies, so that if you have
their vials you can test any meridian and any point on the meridian and select
the best remedy for your patient. You need to choose the patient from your clients
base, connect all necessary things for this procedure and make a test.
In the field
 you can
![]() your homeopathy remedy or any other remedy you
use in your practice and also test it with the software and device and make
your notes how certain remedy influences on a person. Also you can
your homeopathy remedy or any other remedy you
use in your practice and also test it with the software and device and make
your notes how certain remedy influences on a person. Also you can ![]() the information and
the information and ![]() it.
it.
In the field Notes you can enter your own description of the remedy, how it influences on a person, if it suits him or not and other helpful information.
Vega test

You need to plug the metal honey comb with the detecting probe and passive
electrode.
Vega test compares the
resistance between the skin in contact with the passive electrode and the skin
tested with the detecting probe.
Vega test is nearly the same as EAV diagnostics with the difference that the only one point is chosen and if the point is appropriate for testing (shows good results), then the whole testing is conducted on this point.
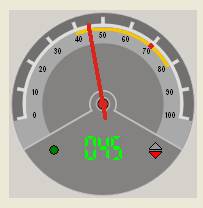
Vega test uses a direct voltage of 0.87 volt through the patient. A dial with 100 scale
divisions shows 100 when the connected resistance is 0, and shows 0 when the
connected resistance is infinity.
Initially, a piezoelectric spark generator, is applied to the patient. This produces a "stress" on
the patient and it unmasks weaknesses in the body. The patient grasps the hand
electrode, and a control measurement is made by applying the detecting probe to
the patient's finger or toe. The machine is adjusted until a reading of 80 to
100 scale units is produced. A chosen vial with homeopathy remedy is now placed
in the honey-comb and the measurement repeated. A drop of 15 scale units or
more is considered a positive result.
The box “Point” shows the name of the point; “Max.” shows the maximum value of the point; “Drop” shows the drop of the measured value; “End, S” shows the second on which the test was ceased; “Vary” shows the difference between maximum value and drop value; “Date” and “Time” show the date and time of the test consequently.
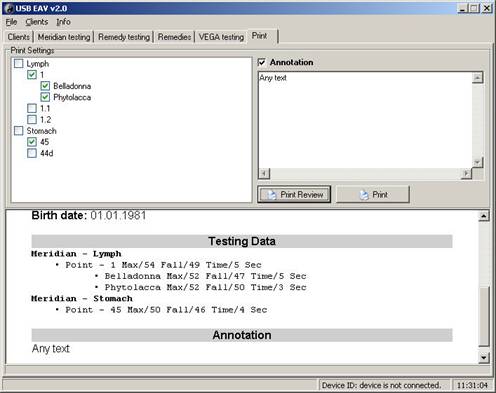
The window ‘Print’ enables you to print out the information about the points you
have just tested.
For example, you tested the Lymph meridian and points 1, 1.1 and 1.2 on it, also
you tested homeopathy remedy Belladonna and Phytolacca for the point 1, also
Stomach meridian and points 45 and 44d on it. With the left click of the mouse
you point the meridian, and with the right click of the mouse you check the box
with the name of the point and homeopathy remedy, like in our example: the
meridian of Lymph, point 1, homeopathy remedies Belladonna and Phytolacca.
In the field ‘Annotation’ you can enter any text you think proper for print out.
You can preview the information you are going to print out by clicking the button
![]() and
the information will be displayed in the field below
and
the information will be displayed in the field below
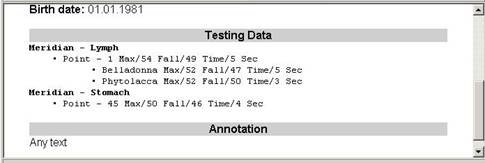
Then press ![]()