PARTNER PROGRAM
USER’S MANUAL
When you open the site you are directed to the authorization page (Fig.1)
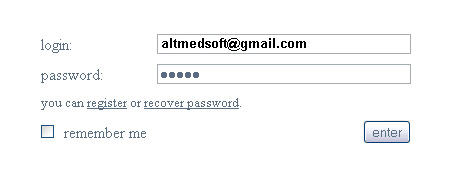
Fig. 1.
Once you have already registered with us, logging your username
(«login») and password («password») entering them in the corresponding fields
(in the field «login» enter your email address you have indicated while registering
Once you have enabled checkbox «remember me », you won’t be required to enter your login and password next time and you will be automatically logged in (you will be directed to the page Settings)
If you forgot your password, visit the recovery password page pressing the link.
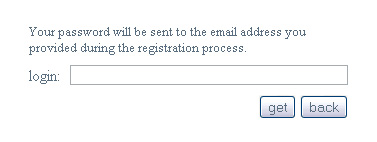
Fig. 2.
To recover the password you will need to enter your login (the one you have indicated when registering) and press the button «get» (Fig. 2.). We will send your password to the email you have indicated while registering. Pressing the button «back» will direct you to the previous page.
If you are not registered yet, you may do so pressing the button «register» (Fig. 1.) and you will be directed to the registration form (Fig. 3.):
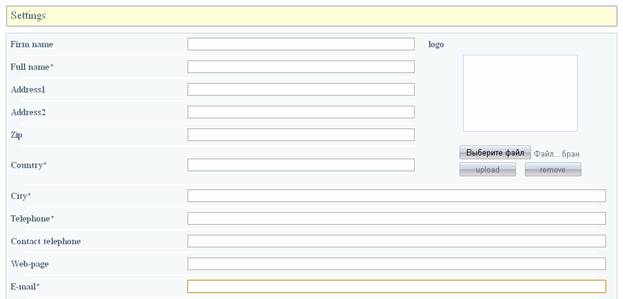
Fig. 3.
The fields contain the information about you. Try to enter accurate information (fields marked with an asterisk (*) are required).
On the right (the window «logo») you can download your logo (your company logo):
press the button «choose a file» and select a picture on your computer,
press the button «upload».
If you want to delete a logo, press the button «remove».
You can choose up to 3 instant messengers (Fig. 4.):
Please choose messenger service in a drop-down list (ICQ, Skype, etc.) and write your number/user account on the right.

Fig. 4.
There are 2 payment options (Fig. 5.):
through the firm that means all money transactions will be realized through the site;
directly that means you can pay a client directly (in this case administration of the site does not take any responsibility for your payment transactions)
You may choose payment systems (in a drop-down list) that you would like to use or enter your bank details in the lower window («Bank accaunt»):
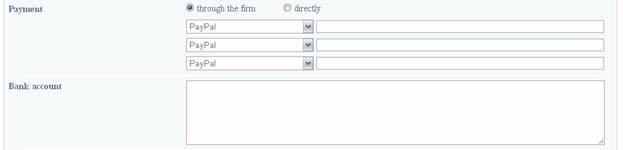
Fig. 5.
Having entered all necessary details, please type in your password (you should remember it), confirm it below and press the button «register».

You have completed the application now. You will receive registration confirmation request by email.
After that your registration will be finished.
Site description
At the top right corner you can choose a language you would like our site to be displayed (Fig. 7);
The left side, under the title, contains menu (Fig. 8.) that can be used for surfing the site.
The window on the right side of the menu displays information associated with menu part.
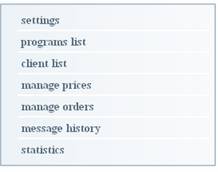
Fig. 7.Fig.8.
Let’s view menu tabs in more details:
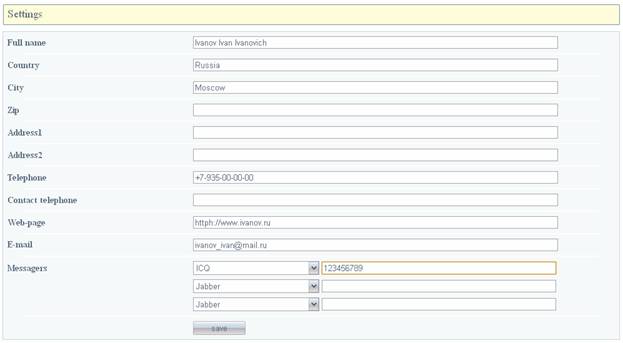
Settings
You can edit or add your details, download or delete your logo, change your payment method, etc. (Note: fields marked with an asterisk (*) are required).
Once you have completed your changes, press «save».
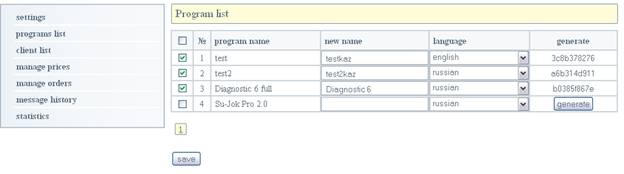
Fig. 9
This tab shows the all programs that are
available for distributing.
You can edit their names (names should not
be repeated) and choose the language from a list that your software will
display by default.
You need to check the boxes with the software you would like to resell.
You should generate a code for each program
that you pass to your clients to register the program.
Having finished the work, save changes with the button «save».
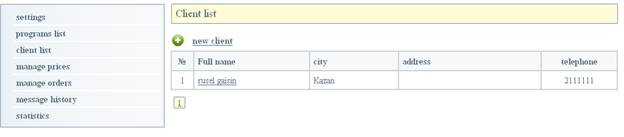
Fig. 10.
The client list contains all of your clients and their short information (number in the list, name and surname, city, address and phone)
You may add a new client or edit the information for the existing client:
- Press the button
 («new client») to add a new
client and you will be automatically directed to the page for adding a new
client (Fig. 11).
(«new client») to add a new
client and you will be automatically directed to the page for adding a new
client (Fig. 11).
Once you have completed filling the fields in (Note: fields marked with an asterisk (*) are required), press «save» to keep the all changes and then you will shift to the clients’ list.
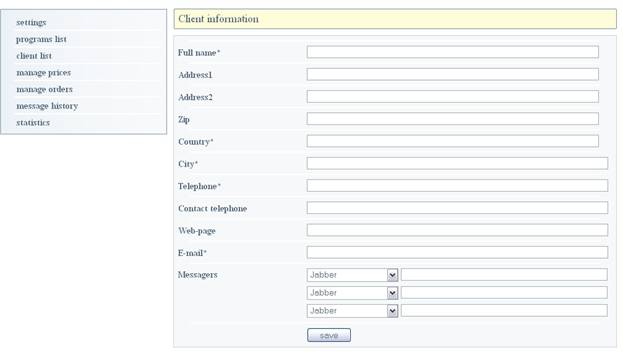
Fig. 11
Also the clients that are not entered in your list, but they are actually your customers, can be added in the clients list automatically without your involvement. You can edit information after their adding.
- To edit client’s data, choose a necessary client and press the client’s name in the list (Fig.10). You will be shifted to the page with client’s data (Fig.12 below).
In order to save changes, press «save».
Having chosen a client from the menu «Client list», you will see 3 subsections of this menu:
«Client details», «Client programs» and «Client devices», you will be shifted to the first section (Fig.12 above)
Let us review the rest 2 sections (the first subsection is described above):
Client list – Client’s programs
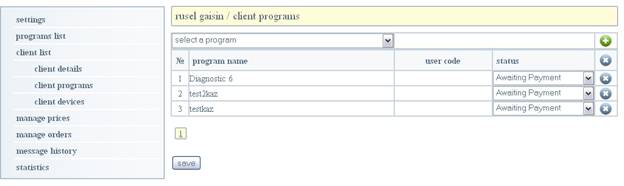
Fig. 13.
Every client has a list with programs (number in the list, its name, user code and status). In order to offer a client the program from drop-down list, you need to choose a necessary program by pressing an icon on the right![]() .
.
Having added the program, it has an order status as «Awaiting payment» until customer pays for it.
To delete the program from the list, press the icon ![]()
To keep your changes press «save».
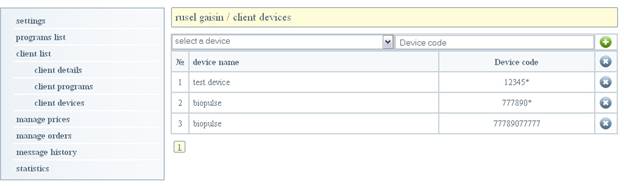
Fig. 14.
This page shows the all client’s devices (its number in the list, name of the device and its code). You can add or delete a device from the list:
In order to add a new device, you should choose it from the drop-down list, the device’s code will be displayed on the right.
For code assigning to the device of a concrete client, you should add arbitrary symbols to the existing one (they can be letters or figures), but it should be unique, not repeatable.
This operation should be done in order to distinguish between the devices of different
clients. To go further press the icon ![]() to add devices in the list.
to add devices in the list.
Choose already existing device from the list in order to delete
it and press the icon ![]()
Manage prices
This tab has 2 sections of submenu. Let us review each of the section:
Manage prices / Programs
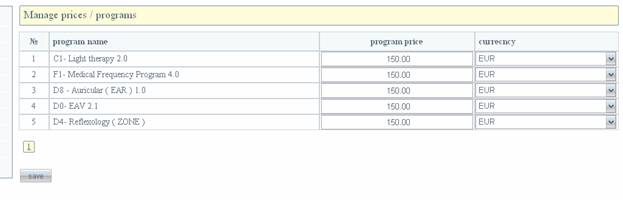
Fig. 15.
This window shows you the all list with the programs (its number in the list, its name, cost and currency) distributed by you.
For each program you can set a price or change it with currency type indication (which is selected form a drop-down list). Note: if you
set «0» in the field «program price», then it will be promoted for free.
Once you have made all changes, press the button «save».
Price management/Credits
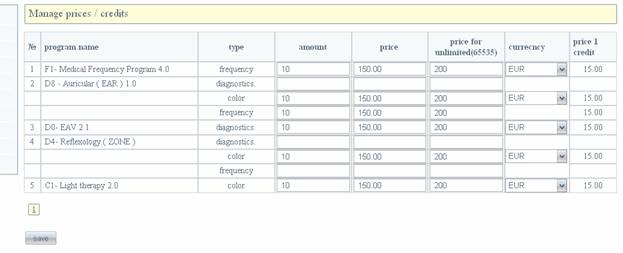
Fig. 16.
The credits amount is displayed on this page for each program (its number in the credits list, program name, type, amount, price, price without credit limits, currency and price per one credit).
You can set the price for a definite amount of credits with currency type indication for each method of diagnostics and treatment.
Please be advised that the price will be calculated for the credits amount that you indicated in a field «amount».
The price for one credit is calculated automatically on the right side.
Note: do not leave «0» in the fields «price» and «price for unlimited», otherwise these credits will be free of charge.
Having entered the changes, press the button «save».
Manage Prices/Discounts

Fig. 17.
This page displays information about devices’ discounts (device’s name, its code, the date when device has been added in the list and discount applied).
Under the name of device we suppose the
device group united territorially, organizationally or other factors; under the device’s code – key symbols (which
are unalterable for this particular device, initial symbols) uniting these
devices.
You are enabled to manage discounts for
every type of the device depending on its code.
Click «save» to save the changes made.
Manage orders
Manage orders / Programs
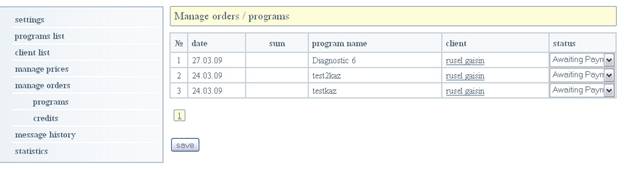
Fig. 18.
This window allows you to view orders for programs that have been made by your customers showing the date, sum, program name and client’s name wishing to order (clicking on the client’s name it is possible to shift to the personal client’s page). Also you can change order status – if the program is paid for or not.
Manage orders / Credits
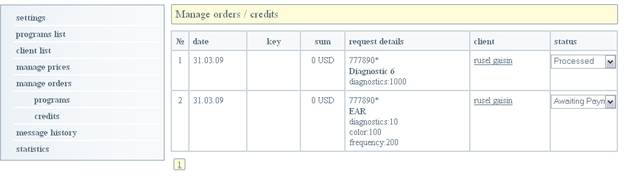
Fig. 19.
This page allows you to obtain information about who made and what orders for credits have been done (date of an order, key, sum, content query: device’s code, program, types and amount of credits, client’s name ordering a credit – by clicking on his name you can shift to his personal page).
Each of the order has its own status which can be changed depending if it is paid or not.
Once you have changed the status for «Processed», the query is received by an administrator.
Having generated a key for the query, you and your client will receive a notification message with the key. As well as the orders’ list will be filled in with the order’s key in the field «key».
An example of working with the site.
After you have registered, we will go to the tab «Programs list».
With the next step we choose the program we would like to promote/resell.
In our example we will select the following programs:
C1- Light therapy 2.0, D4- Reflexology ( ZONE ), D0- EAV 2.1, D8 - Auricular ( EAR ) 1.0, F1- Medical Frequency Program 4.0 (Fig. 20, see below).
In the field «new name» we enter a name of the program, under which we would like to promote them (in our example we will use their original names). But you can give any names you want.
Further we are generating a code for each of the program in the field «generate» (this code will be promoted with the given program). Save the changes (the button «save»).

Then we shift to the tab «manage prices», and set the price for each program in a newly opened window «programs».
In the present example we will set the one price for all programs «150» in «EUR» currency. (Note: Do not leave the fields empty. If you are going to distribute the programs for free of charge, enter a figure «0»). Saving the changes.

Fig. 21.
The next step: we go to the submenu «credits» (Fig. 22.)
Setting the credits cost for each program in each action type:
«diagnostics», «color» and «frequency» (the program is able to support any of these actions or all). For convenient calculations of the orders, we will set the amount («amount») equal to «10», and the cost for each of the above mentioned actions equal to «150» (the last column will automatically display the cost of one credit).
We will set the cost of unlimited access to the program («unlimited») equal to «2000», currency «EUR» (Note: Do not leave the fields empty. If you are going to distribute the programs for free of charge, enter a figure «0»). Saving the changes.

Fig. 22.
We go to the submenu «discounts». This page allows us to set a discount for a device. In our example we have 2 devices: «test device» и «test device 2» (Fig. 23.).
Actually, they are 2 groups of device divided for promoting in various country areas. Each of these devices has a similar initial code part which is indicated in the column «device code». We will set the discount for the devices: «2%» and «7%» ( the discount is set in correspondence with economical situation in a country/area, etc. but you have another obvious reasons to set your particular discount). Saving the changes.

Fig. 23.
Now, when we have set the all prices, we go to the tab «client list». Let’s add a client «Aleksey» and «mihail» (Fig. 24.).
Adding for each client the programs («client programs») and devices («client devices») (submenu with these tabs will appear after you will choose the client from «clients list») (Fig. 25. And Fig. 26.).
Adding the device you should enter a device’s code – we leave its initial code by default and write some arbitrary symbols just for a case if you know the code of the device which is sold. If for any reason you don’t know the code, a client can add himself and his device code automatically, having entered register fields in the programs. If you distribute devices in various areas or countries you are enabled to manage their prices by setting the discounts (Fig. 23). (Do not forget to save after adding the program).
If you did not have a chance to add a client, then a client has an opportunity to fill in his details when he orders a program or credit; doing so he will be automatically added in your clients’ list.
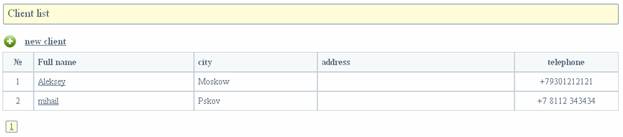
Fig. 24.
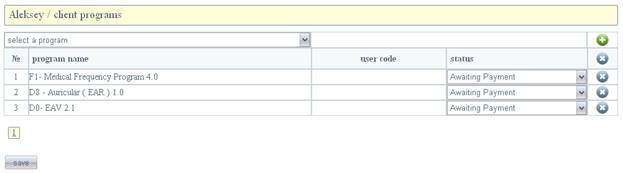
Fig. 25.

Fig. 26.
Having added a program (Fig. 25.), opposite each program an order status («Awaiting Payment») will be automatically set (as well as in the tab «Manage orders» / programs»).
This means that the program is not paid yet.
You can change the status when an order will be paid for (payment systems and bank details are listed in the menu «settings»; If you have chosen direct payment method – site administration does not take any responsibility for your money transactions).
After order status is changed, you, your client and site administrator will receive notification by email that order status has been changed
Going now to the tab «Manage orders» -«programs».
We can review here the clients’ programs, their status as well as the program cost with discount included. For example, a client «Aleksey» paid for all 3 programs, let’s change the status for «paid» (Fig. 27.). Save changes. We get 3 messages to our email notifying that client «Aleksey»’s status has been changed. The same messages are sent to a client that paid for an order and site administrator.
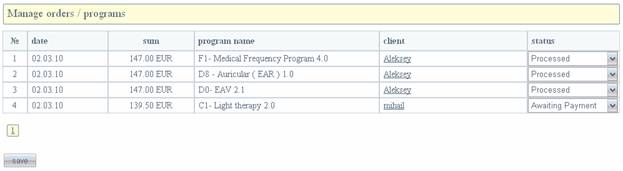
Fig. 27
The tab «Manage prices» – «Credits».
You are able to view your clients orders for credits (as you do not have any orders for credits, an empty page opens). You can set if a certain order is paid for or not yet (it is similar to program payment management; notifications will be sent to the above mentioned emails).